Unit 18 - 上傳圖片到 Server, 並將圖片轉成 base64 格式
Unit 18
問題
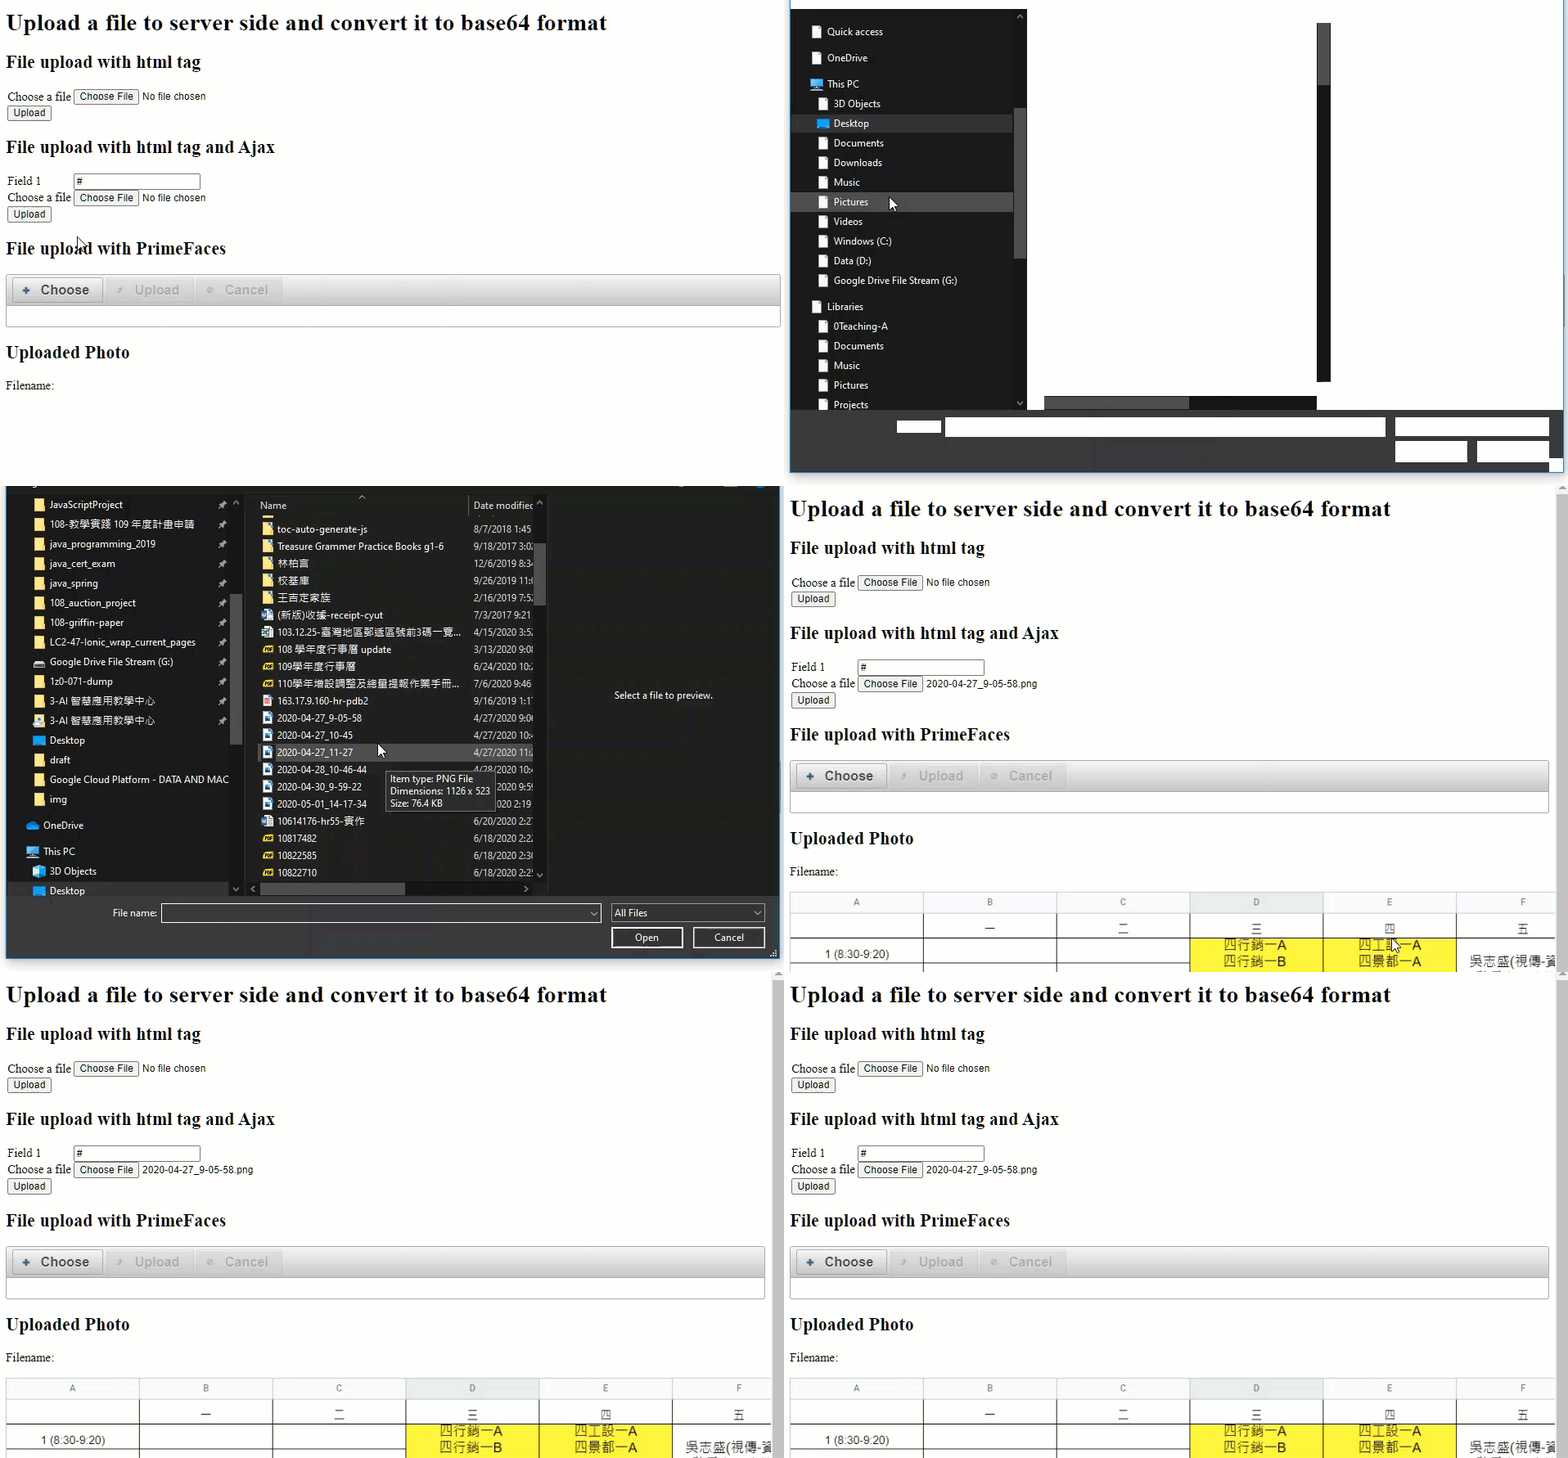
讓使用者上傳單張圖片到 Server 端, 之後將圖片轉成 base64 格式, 以利後續儲存或顯示.
介紹兩種上傳方式:
- 第一個為一般的提交,選擇檔案後, 按下 submit 按鈕。
- 第二種為 Ajax 提交, 選擇檔案後, 自動提交
技術原理
- Data url
- URLs prefixed with the data: scheme, allow content creators to embed small files inline in documents.
- Ref: Data URLs
- base64 格式
- Base64 is a group of binary-to-text encoding schemes that represent binary data in an ASCII string format by translating it into a radix-64 representation. The term Base64 originates from a specific MIME content transfer encoding.
- Ref: Base64 - Wikipedia
相關技術文件
- Unit 06 - 上傳及下載檔案
- 17.16 The fileupload Example Application with Servlet 3.0 - Java Platform, Enterprise Edition: The Java EE Tutorial (Release 7)
相關 API
Java 9
- java.util.Base64
- java.io.InputStream
Demo Source Code
Demo Code: t11 directory @ jsf_under_training_codes - Bitbucket
實作 1
專案設定
Project Dependency
- 使用 Primeface 8.0 及 lombok 1.8.12
- 部分
pom.xml内容
1
2
3
4
5
6
7
8
9
10
11
12
13
<!-- https://mvnrepository.com/artifact/org.projectlombok/lombok -->
<dependency>
    <groupId>org.projectlombok</groupId>
    <artifactId>lombok</artifactId>
    <version>1.18.12</version>
    <scope>provided</scope>
</dependency>
<!-- https://mvnrepository.com/artifact/org.primefaces/primefaces -->
<dependency>
    <groupId>org.primefaces</groupId>
    <artifactId>primefaces</artifactId>
    <version>8.0</version>
</dependency>
- 因爲使用了 lombok project 自動產生 getter 及 setter, Maven compiler plugin 要額外設定.
- Maven compiler plugin 的設定:
1
2
3
4
5
6
7
8
9
10
11
12
13
14
15
16
17
18
19
20
 <plugin>
     <groupId>org.apache.maven.plugins</groupId>
     <artifactId>maven-compiler-plugin</artifactId>
     <version>3.1</version>
     <configuration>
         <source>1.8</source>
         <target>1.8</target>
         <compilerArguments>
             <endorseddirs>${endorsed.dir}</endorseddirs>
         </compilerArguments>
         <!--Set the lombok for the compiler plugin-->
         <annotationProcessorPaths>
             <path>
                 <groupId>org.projectlombok</groupId>
                 <artifactId>lombok</artifactId>
                 <version>1.18.12</version>
             </path>
         </annotationProcessorPaths>
     </configuration>
 </plugin>
PrimeFaces 設定
- 使用了 PrimeFaces 的
<p:fileUpload>上傳檔案.- 此 tag 可使用 Servlet 3.0 或者 Apache Commons, 需要額外設定.
- 參考 PrimeFaces Documentation
- 加入
web.xml的設定内容:
1
2
3
4
 <context-param>
        <param-name>primefaces.UPLOADER</param-name>
        <param-value>auto</param-value>
    </context-param>
Web Components (CDI Beans) 建立
檔案上傳處理程序
- JSF 透過 value binding, 將 file bind 到 某個 Bean property.
- 該 Bean property 的資料型態為
javax.servlet.http.Part
- 該 Bean property 的資料型態為
- 由
Part物件取得inputStream, 讀取内容到byte[] - 使用
Base64.Base64.getEncoder().encodeToString()將byte[]的内容轉成 base64 string format. - 若要在
<img>的src屬性中直接使用 base64 格式圖片内容, 需要加上 media type 及 編碼格式指示:data:image/png;base64,注意:h:form的編碼方式要改成enctype="multipart/form-data"
Upload action method
Action Method 內的程序邏輯:
- 使用
Part物件取得InputStream物件, 以讀取圖片內容 - 將圖片內容存到
byte [] - 使用
Base64物件對byte[]內圖片內容進行 Base64 編碼 - 取得圖片的 Base64 内容編碼之後, 將其值設定到 bean property
base64Photo, 以利後續使用<img>顯示圖片
1
2
3
4
5
6
7
8
9
10
11
12
13
14
15
16
17
18
19
20
21
22
23
24
25
26
27
28
29
30
31
32
...
    private Part uploadPart;

 /**
     * Save file to the file system in the server-side.
     * @return null (Stay in the same page).
     */
    public String uploadAction() {
        if (uploadPart == null) {
            return null;
        }

        //Get the input string from the Part Object
        InputStream is = null;
        try {
            is = uploadPart.getInputStream();
            // Convert the input stream to the byte array
            // Ref: https://magiclen.org/java-base64/
            byte[] bytes = is.readAllBytes();
            // Convert the base64 string to data uri
            // Ref: https://blog.gtwang.org/web-development/minimizing-http-request-using-data-uri/
            // Schema:  data:[<media type>][;base64],<data>
            String base64Str = Base64.getEncoder().encodeToString(bytes);
            this.base64Photo = "data:image/png;base64," + base64Str;
        } catch (IOException ex) {
            Logger.getLogger(UploadBean.class.getName()).log(Level.SEVERE, null, ex);
        }
        //Set the file name property
        filename = uploadPart.getSubmittedFileName();

        return null; // Stay in the same page
    }
JSF Page
Form to upload the file
- 表單的 enctype 要設定成 multipart/form-data
- enctype 資料上傳到伺服器時瀏覽器使用的編碼型別
- multipart/form-data 會將表單内的每個欄位各自編碼
- 使用
<h:inputFile>上傳檔案, 其value屬性 binding 的 property 的型態需要為javax.servlet.http.Part
1
2
3
4
5
6
7
8
 <h2>File upload with html tag</h2>
 <h:form enctype="multipart/form-data">
     <h:panelGrid columns="2">
         <h:outputLabel for="selectFile">Choose a file</h:outputLabel>
         <h:inputFile id="selectFile" value="#{uploadBean.uploadPart}"/>
         <h:commandButton value="Upload" action="#{uploadBean.uploadAction}"/>
     </h:panelGrid>
 </h:form>
Element to display the image using base64 format
1
2
3
<h2>Uploaded Photo</h2>
<p>Filename: #{uploadBean.filename}</p>
<img jsf:id="display" src="#{uploadBean.base64Photo}" />
實作 2: 使用 Ajax 的方式, 選擇圖片後, 自動上傳圖片

工作原理
- 修改實作 1 的程式碼
- 監聽上傳圖片的
<h:inputFile>的valueChangeajax event - 當
valueChangeajax event 被觸發時, 提出請求(request), 只將<h:inputFile>元素送往後端 Server 處理 - Server 端請求處理完畢後, 回應 Browser 處理結果, 用以更新 HTML 的 DOM 模型。我們指定更新顯示上傳圖片的元素。
修改步驟
JSF 頁面
1
2
3
4
5
6
7
8
9
10
11
12
13
14
15
16
17
18
19
<h2>File upload with html tag and Ajax</h2>
<h:form enctype="multipart/form-data">
    <h:panelGrid columns="2">
        <h:outputLabel>Field 1 </h:outputLabel>
        <h:inputText value="#"></h:inputText>
        <h:outputLabel for="selectFile">Choose a file</h:outputLabel>
        <h:inputFile id="selectFile" value="#{uploadBean.uploadPart}">
        <!-- #1 -->
            <f:ajax event="valueChange" execute="@this" render=":display"
                    listener="#{uploadBean.handleFileUploadAjaxListener}"/>
        </h:inputFile>
    </h:panelGrid>
</h:form>

<h2>Uploaded Photo</h2>
<p>Filename: #{uploadBean.filename}</p>
<!--passthrough element; HTML tag friendly-->
<img jsf:id="display" src="#{uploadBean.base64Photo}" />
<br />
說明: 標示 #1:
- 使用
<f:ajax>使元素具備 Ajax 的能力 - 屬性
event="valueChange": 監聽上傳圖片的<h:inputFile>的valueChangeajax event - 屬性
execute="@this": 事件觸發後, 將<f:ajax>的父元素送交後端 Server 處理 - 屬性
listener="#{uploadBean.handleFileUploadAjaxListener}": 事件觸發後, 要執行的 bean method - 屬性
render=":display": 請求處理後, 重新 render id 為display的元素
Ajax 事件的 event listener
1
2
3
4
5
6
7
8
9
10
11
12
13
14
15
16
17
18
19
20
21
22
23
24
25
26
27
28
29
30
31
32
33
34
35
36
@Named(value = "uploadBean")
@SessionScoped
// Use lombok to generate the getters and setters. See: https://kucw.github.io/blog/2020/3/java-lombok/
@Getter
@Setter
public class UploadBean implements Serializable {

    private Part uploadPart;
    private String filename = "";
    private String base64Photo;

// #1
public void handleFileUploadAjaxListener(AjaxBehaviorEvent event) {
        this.base64Photo = toBase64Str(uploadPart);
        this.filename = uploadPart.getSubmittedFileName();
    }

// #2
private String toBase64Str(Part part){
        String result ="";
        try {
            InputStream is = uploadPart.getInputStream();
            // Convert the input stream to the byte array
            // Ref: https://magiclen.org/java-base64/
            byte[] bytes = is.readAllBytes();
            // Convert the base64 string to data uri
            // Ref: https://blog.gtwang.org/web-development/minimizing-http-request-using-data-uri/
            // Schema:  data:[<media type>][;base64],<data>
            String base64Str = Base64.getEncoder().encodeToString(bytes);
            result = "data:image/png;base64," + base64Str;
        } catch (IOException ex) {
            Logger.getLogger(UploadBean.class.getName()).log(Level.SEVERE, null, ex);
        }
        return result;
}
標示 #1 說明:
- Ajax 事件觸發後, 圖片檔案會先儲存到 bean property
uploadPart中, 之後再執行 Ajax event listener - Ajax event listener 方法的簽名:
1
public void ajaxListenerName(AjaxBehaviorEvent event)
標示 #2 說明:
- 給與一個
Part物件,傳回該物件的 Base64 編碼字串。